📌 Introduction to Git on RHEL 9
Git is an open-source version control system used by developers around the globe. It helps manage code changes, enables team collaboration, and maintains a detailed history of every revision.
If you’re working on a Red Hat Enterprise Linux 9 system, learning how to install and use Git is a critical first step toward building a solid developer environment.
This guide walks you through how to install Git on RHEL 9 using the terminal, configure it for the first time, and perform common Git operations.
✅ System Requirements and Prerequisites
Before diving into the installation steps, ensure the following:
-
A machine running Red Hat Enterprise Linux 9 (RHEL 9)
-
Root access or
sudoprivileges -
Basic familiarity with Linux terminal and command-line usage
Installing Git is essential for Linux developers, sysadmins, and software engineers who manage source code repositories or contribute to projects hosted on platforms like GitHub and GitLab.
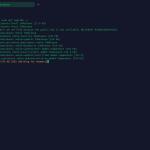
🔄 Step 1: Update Your RHEL 9 System
Updating your system ensures all packages are current and reduces compatibility issues during installation.
Run the following command in your terminal:
This refreshes the system’s repository indexes and installs the latest package versions.
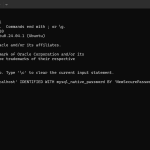
🔧 Step 2: Install Git Using Yum on RHEL 9
Red Hat-based systems like RHEL use YUM (Yellowdog Updater Modified) as the default package manager. Use it to install Git:
YUM resolves dependencies automatically, making it the easiest way to install open-source tools like Git on Red Hat Linux 9.
✅ Step 3: Confirm Git Installation
After installation, verify that Git is installed correctly by checking its version:
Expected output:
Seeing the Git version confirms a successful installation on your Red Hat systems.
🛠️ Step 4: Configure Git on Red Hat Linux
Before using Git, set your identity so that your commits include accurate author information:
These commands update your Git configuration globally. To view the saved settings, use:
This setup is crucial for contributors working on shared repositories.
🚀 Step 5: Essential Git Commands to Get Started
Git offers powerful tools for version control and collaboration. Here are key commands every developer should know:
📁 Initialize a New Repository
This creates a new .git folder in your project directory and starts tracking your code.
➕ Stage Files for Commit
Use this to move files into the staging area. To stage all files:
💾 Commit Changes
Commits the staged changes with a description, creating a restore point in your Git history.
🔍 Check Repository Status
Displays current branch info, changes to be committed, and untracked files.
📜 View Git Commit History
Shows all previous commits, authors, dates, and commit messages. Use q to exit the log view.
🧰 Optional: Clone a Remote Git Repository
If you’re working with GitHub, GitLab, or any remote Git server, use the clone command:
This copies the complete repository and history to your local system.
💡 Bonus Tips for Git on RHEL 9
-
Use SSH keys for secure Git authentication
-
Store your Git credentials with
git config credential.helper -
Explore Git aliases for faster workflows (e.g.,
git config --global alias.co checkout)
❓ Frequently Asked Questions (FAQs)
📌 What is the default Git version in RHEL 9?
As of 2025, RHEL 9 includes Git 2.39+ in its repositories. For newer versions, consider compiling from source or using a third-party repository.
📌 Can I install Git on RHEL without sudo?
You’ll need root privileges to install Git system-wide. For user-level installs, you can compile Git locally using source code.
📌 Where is Git installed on RHEL 9?
Typically, Git binaries are located in /usr/bin/git. Use which git to confirm.
🧾 Conclusion
You’ve now successfully learned how to install Git on Red Hat Enterprise Linux 9 (RHEL 9), configure it, and start using basic Git commands. Mastering Git is essential for efficient code management, collaboration, and project tracking in any professional development environment.
Whether you’re building enterprise-level applications or managing solo projects, Git is a must-have tool in your Linux development toolkit.